Using the Generic HTML Connector
The Generic HTML Connector enables you to develop solutions that interact with the Chrome and Firefox browsers. From version 7.3, support was added for Microsoft Edge based on Chromium.
From version 7.6, support was added to work with these browsers in parallel (that is, with multiple browsers of different types open simultaneously).
From version 7.8, the Generic HTML connector supports:
-
Manifest V 3 for Chrome and Edge.
-
Capturing custom HTML tag elements.
-
JavaScript from the web page for execution.
From version 7.9, the Generic HTML connector supports capturing shadow DOM elements.
To use the Generic HTML Connector, capture at least one screen element in your project. This enables the ScreenPluginGenericHtml.Library in the project.
To connect to Internet Explorer, use the Web Connector for Internet Explorer, as described in Using the Web Connector for IE.
The Real-Time Designer only supports Edge based on Chromium. It is not compatible with previous versions of the Edge browser that were based on other technologies.
The connector is installed automatically when you install the Real-Time Designer, and is enabled for capture. In order to capture from a web browser, you need to install and enable the NiCE Browser Connector extension, as described in Using the Generic HTML Connector.
If you are using Firefox 74 or higher, the NiCE Browser Connector extension will not install automatically. To use this extension, either install the extension manually, as described in Updating your NiCE Browser Connection Extension in Firefox, or install an earlier version of Firefox.
Enabling the Real-Time Designer and Client to Work with Generic HTML Screen Elements
The Generic HTML Connector is installed automatically when you install the Real-Time Designer, and is enabled for capture.
In order to capture from Chrome, Firefox, or Edge Chromium browsers, you need to install and enable the NiCE Browser Connector extension. If you try and capture a screen element in a browser and the extension is disabled, a message appears, similar to the following:

Once you have enabled the extension, restart the browser before starting the Real-Time Designer and capturing browser screen elements.
To enable the Real-Time Designer and Client to work with the Generic HTML Connector:
-
Complete the Real-Time Designer installation process. For more information, see the Real-Time Client and Designer Server Installation Guide.
-
Start the Real-Time Designer and, in the Physical Objects tab, expand the Connectors Enabled for Capture drop-down list.
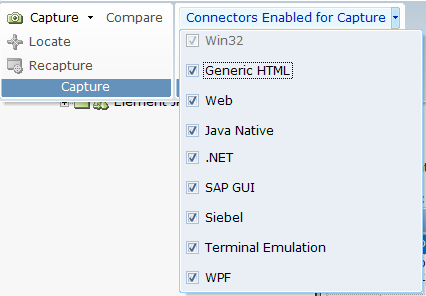
Generic HTML is selected by default, indicating that it is enabled for capture. If necessary, clear the Generic HTML checkbox to disable the connector.
-
Install and enable the NiCE Browser Connector for the browser(s) from which you want to capture objects with the Generic HTML Connector.
To install and enable the NiCE Browser Extension for Chrome:
-
Open Chrome.
-
If the NiCE Browser Connector added confirmation message appears, click Enable extension.
-
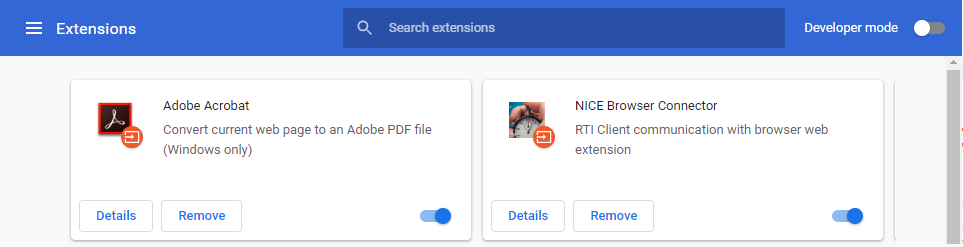
Open the Extensions page by typing chrome://extensions/ in the Chrome address bar.
The NiCE Browser Connector extension is installed automatically the first time you open Chrome after installing the Real-Time Designer or Real-Time-Client. In some cases however, your security settings may prevent the NiCE Browser Connector from being installed. If you do not see the NiCE Browser Connector extension on the Extensions page, click here to install from the Chrome Web Store.
-
Verify that the NiCE Browser Connector extension is enabled. If it is not enabled, click the toggle switch to enable it.
To install and enable the NiCE Browser Extension for Firefox:
If you are using Firefox 74 or higher, the NiCE Browser Connector extension will not install automatically. To use this extension, either install the extension manually, as described in Updating your NiCE Browser Connection Extension in Firefox, or install an earlier version of Firefox.
-
Open Firefox.
-
In the top-right corner, click Open menu
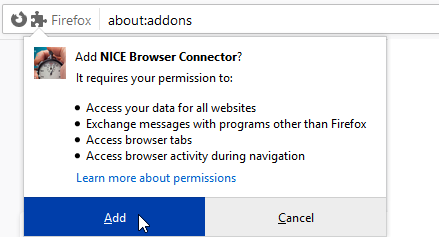
 . If the NiCE Browser Connector added to Firefox message appears, click it.
 -
When you are prompted for confirmation, click Enable.
The NiCE Browser Connector extension is enabled and ready to use.
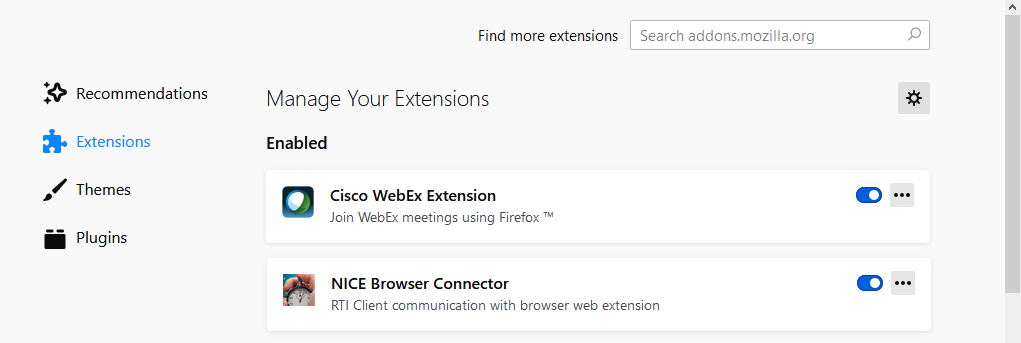
To open the Manage Your Extensions page and manually enable the connector, type about:addons in the Firefox address bar.
Occasionally, you might be instructed to update your NiCE Browser Connector extension in Firefox. For details on updating the extension, see Updating your NiCE Browser Connection Extension in Firefox.
To install and enable the NiCE Browser Extension for Edge Chromium:
-
Open Edge Chromium.
-
If the NiCE Browser Connector added confirmation message appears, click it.
-
On the Installed extensions page, browse to the NiCE Browser Connector, and verify that it is enabled. If it is not enabled, click the toggle switch to enable it.
The NiCE Browser Connector extension is enabled and ready to use.
The NiCE Browser Connector extension is installed automatically the first time you open Edge Chromium after installing the Real-Time Designer. In some cases however, your security settings may prevent the NiCE Browser Connector from being installed. If you do not see the NiCE Browser Connector extension on the Installed extensions page, click here to install from Edge Add-ons.
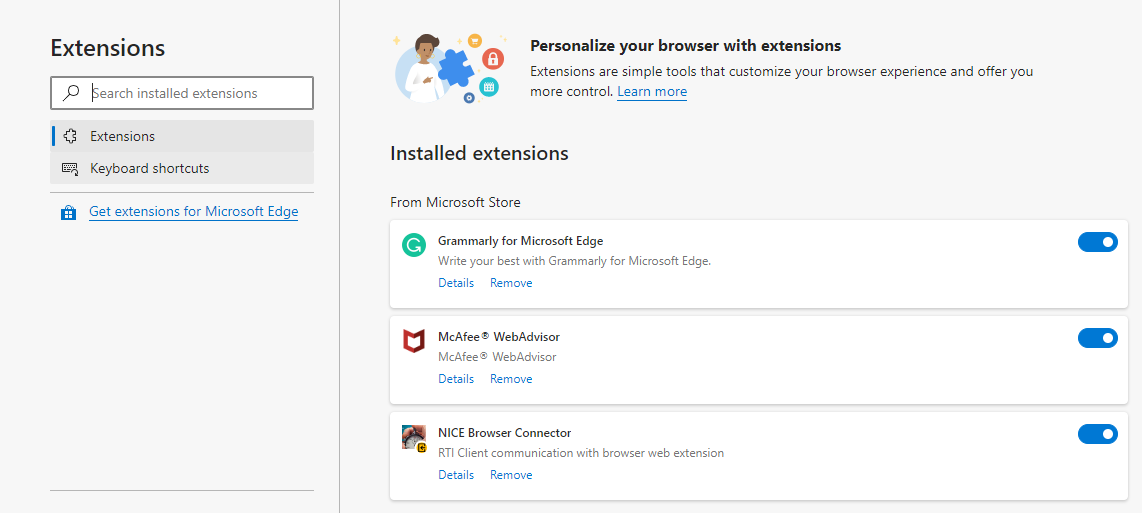
If the Installed extension page does not open automatically, you can open it by clicking the ellipsis in the top-right corner of Edge Chromium, and selecting Extensions from the menu.
-
The Edge extension ID in the URL must match the extension ID in nativehost.json as shown below.
Edge extension ID in the URL:
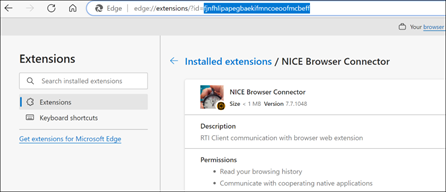
Edge extension ID in nativehost.json:
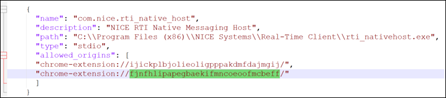
If the Edge extension is not installed with the ID 'fjnfhlipapegbaekifmncoeoofmcbeff', remove the extension from Edge and install it from: https://microsoftedge.microsoft.com/addons/detail/nice-browser-connector/fjnfhlipapegbaekifmncoeoofmcbeff
Updating your NiCE Browser Connection Extension in Firefox
Occasionally, you might be instructed to update your NiCE Browser Connector extension in Firefox. In addition, if you are using Firefox 74 or higher, the NiCE Browser Connector extension will not install automatically. To use this extension, either install the extension manually, as described in this procedure, or install an earlier version of Firefox.
To update your NiCE Browser Connection Extension in Firefox:
-
Open Firefox, and type about:addons in the address bar to open the Manage Your Extensions page.
-
Click the Gear button
 .
. -
From the menu, select Install Add-on From File.

-
Browse to the C:\Program Files (x86)\NICE Systems\Real-Time Client folder and select the nice_rti_firefox_connector-fx.xpi file.
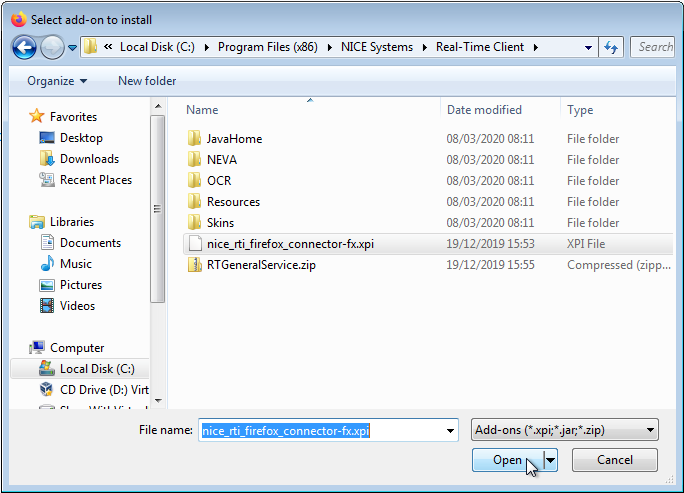
-
Click Add.
-
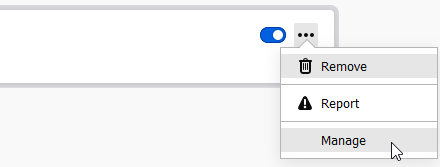
To verify that the extension was updated, locate the NiCE Browser Connector and click the ellipsis in the top-right corner.
-
Click Manage.
-
Verify the Last Updated date.
